Weaving · dimensions and workspace / Decision guide
Choose your first rigid heddle loom by towel width and working space
Choose the smallest loom that can weave your intended towel pattern and that you can operate comfortably in your actual workspace. Check the pattern’s width at the reed first, then the loom’s outside dimensions, shuttle movement and storage needs. A loom sold as 16 inches wide does not promise a finished towel 16 inches wide.
For a practical starting point:
- Choose a narrower loom if the patterns you genuinely want fit its weaving width and you need an easier-to-store setup.
- Consider a wider loom if a specific project requires it, not simply because you might want larger cloth someday.
- Pause before buying if the seller supplies weaving width but not the assembled dimensions you need to check your room.
Start with a towel you would actually use
Measure the width of a kitchen towel you like after laundering it. Decide whether that width is essential or merely familiar. A smaller hand towel can be a useful first project, but it will not replace a larger tea towel if that is what you need.
Next, find a suitable pattern and record two separate numbers: finished width and width at the reed, where the warp threads pass through the loom. Also check its stated minimum loom size. Do not choose the loom from the photograph or finished measurements alone.
Gist’s Citrus Towels pattern listing provides a useful real example: 14 inches (35.6 cm) of weaving width produces towels listed as 12 inches (30.5 cm) wide. The accompanying published project notes specify a loom at least 15 inches (38.1 cm) wide and describe the finished size after washing and hemming. This demonstrates why a smaller towel can fit a 15- or 16-inch-class loom. It does not establish the finished width of every towel woven on one.
Use the linked pattern for its instructions rather than treating those three measurements as a complete project plan.
Keep weaving width and finished width separate
Draw-in during weaving and changes during finishing can both affect the result. Ashford’s weaving booklet specifically addresses avoiding draw-in and washing the woven fabric. The important buying implication is that the space occupied by the warp is not a guaranteed finished measurement.
For an established pattern, use the designer’s equipment requirement and finished-size expectation. If substituting yarn, changing the spacing of the warp threads or inventing the towel, weave and finish a sample before relying on a size prediction. Record the yarn, setup and washing method so the sample is meaningful for the larger project. A class or borrowed loom can help you do this before purchasing your own.
Do not apply a blanket shrinkage percentage to every fibre and pattern. In particular, an allowance used to plan warp length is not automatically a rule for finished width. If the finished width is non-negotiable and you have no matching pattern or sample, that uncertainty remains unresolved.
Compare the right numbers on the loom listing
Ashford lists its standard rigid heddle loom in nominal weaving widths including 40 cm (16 inches) and 60 cm (24 inches). Those are the maker’s product-size labels, not exact imperial-to-metric conversions or assembled-frame measurements.
A 24-inch-class loom offers more weaving width, but its complete space requirement cannot be calculated simply by adding eight inches to the smaller model’s footprint. Ask for the exact model’s assembled width, depth and height, including protruding handles or knobs. If a stand is part of your plan, request its footprint separately.
The same manufacturer lists 46 cm (18-inch) stick shuttles with the RH400 and 56 cm (22-inch) shuttles with the RH600. Shuttle length is another measurement to check, not a formula for how much clear space every weaver needs.
Scroll the diagram sideways to read all labels.
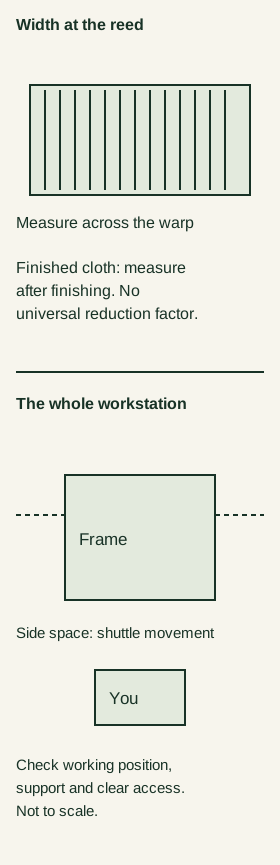
Check the space while sitting where you will weave
Measure the usable table or floor area, not the whole room. Then check four parts of the setup:
- The support. Can the loom sit or attach as its instructions require? Include table edges, clamps and any stand legs. A wide tabletop does not necessarily have a usable edge.
- Your position. Sit in the intended chair and check where your knees, elbows and feet will go. Account for the table apron and nearby furniture.
- The movement. Allow for moving the heddle and drawing the shuttle clear of the warp on either side. Check nearby walls, chair arms and shelves at the height of that movement.
- The room around you. Keep the normal route into and through the room usable. A setup that fits only while blocking a doorway is not a workable permanent arrangement.
Once you have confirmed frame dimensions, mark them on paper or cardboard and place the outline where the loom would go. Use a strip the length of the intended shuttle to rehearse its movement. This is a screening exercise you can do, not a substitute for trying a real loom: cardboard cannot reproduce weight, resistance or reach to the controls.
Gist’s loom-selection guide also flags arm span and control of a wider reed. If possible, try both sizes at a shop, class or guild before deciding. Being able to touch both ends is less informative than being comfortable repeating the weaving motion.
Include setup and storage in the decision
Your weaving corner and your warping space may be different places. Read the chosen loom’s warping instructions before assuming everything happens within its footprint. Identify where the equipment and yarn will go during setup and how you will keep that area clear.
For storage, ask for dimensions in the actual state you intend to store it. If a loom folds, check whether that is possible with a project on it and whether a bag, stand or accessories change the stored size. Do not substitute shipping-box dimensions for assembled dimensions.
Compare the complete purchase too: the reed required by your first pattern, any necessary support, shuttles and storage. Verify compatibility for the specific model rather than assuming accessories transfer between widths.
Make the final choice against three real projects
List your first towel pattern and two plausible next projects. Beside each, record its required weaving width, reed and expected finished size. Then compare that list with your confirmed workspace and storage measurements.
If the narrower loom handles those projects, it is a reasonable starting point. If an important project exceeds its width, choose a wider loom only after checking the working setup. Joining narrow panels creates a seam and changes the project; it should be a deliberate design choice, not a surprise workaround.
The useful outcome is a loom that accommodates the cloth you want and a place where you will actually use it. This guide is based on published specifications and weaving guidance, not hands-on testing of the looms or their ergonomics.