North America · cold winters / Decision guide
Removing a rain barrel for winter? Plan the downspout's route first
For cold-winter North American homes. Instructions checked on 19 October 2026.
Emptying the barrel is only half the job. If the downspout now ends at barrel height, restore a route down and away from the house. If the downspout still continues below a diverter, follow that diverter's winter procedure and check where the remaining outlet drains. Do not copy a winter-cap instruction from a different system. Rutgers' cut-downspout method · EarthMinded's model-specific guide
Which arrangement do you have?
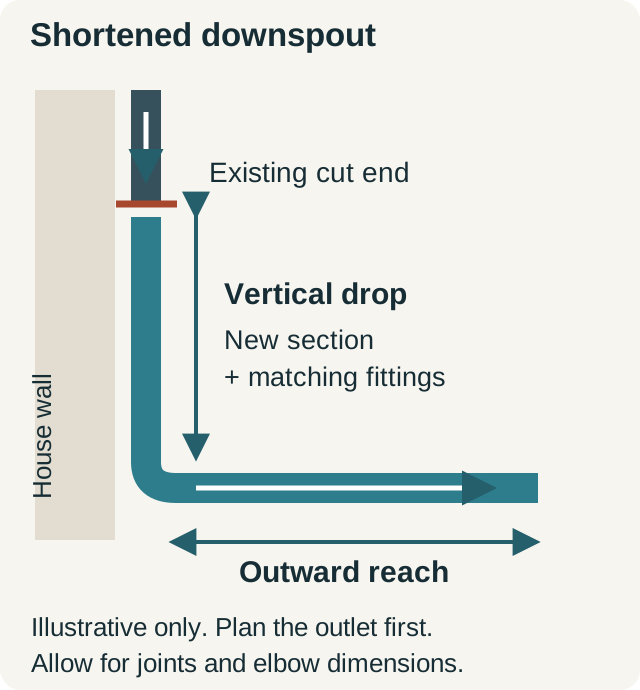
A shortened downspout that empties into the barrel
Once the barrel is removed, there is a missing section of the drainage route. Rutgers describes adding a matching downspout section and connector, an elbow at the bottom, and suitable clips or straps to secure it. The elbow sends the water away from the house rather than dropping it at the wall. Rutgers winterization instructions
Scroll the diagram sideways to read all labels.
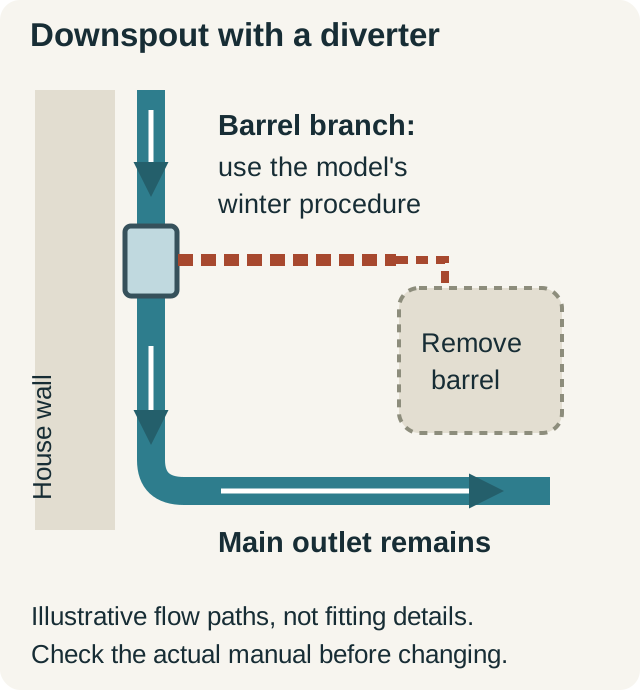
A diverter with a continuing lower downspout
Here the main drainage route remains, but the branch to the barrel needs the correct winter treatment.
For example, the EarthMinded FlexiFit Universal Rain Barrel Diverter System FDS-0001 V.1 guide says to remove the diverter, drain the barrel away from the foundation, fasten the winter hole cover over the downspout opening and store the barrel and diverter. That is a specific remove-and-cover procedure, not permission to leave every diverter in place. EarthMinded user guide, “Winterizing the barrel”
Some other designs work differently. RainBarrel.ca's Best Downspout Diverter page describes leaving that model installed and configuring internal parts for winter flow. Check the name and version of your own diverter before removing, capping or changing anything. Best Downspout Diverter winterization
Scroll the diagram sideways to read all labels.
Measure two things before choosing an extension
A flexible extension can be long enough to reach the ground but leave little length to carry water away. Avoid that surprise by making a small sketch before shopping or cutting.
Record:
- Downspout shape and outside dimensions: ___
- Vertical route from the existing cut end to the planned bottom elbow: ___
- Horizontal route from that elbow to the proposed discharge point: ___
- Obstacles along either route, including a gate or walkway: ___
- Existing connector, elbow and bracket details, ideally with photographs: ___
- Local drainage requirements or installer advice to confirm: ___
The vertical measurement is a planning measurement, not automatically the cut length of a new pipe. Connections overlap, and elbows occupy space. Check the actual fittings' dimensions and fit before cutting. For an unfamiliar arrangement, take your sketch and measurements to a gutter supplier or installer rather than guessing from the barrel's height.
Choose the discharge point before fitting the pipe
The endpoint matters as much as the extension. Toronto's guidance says water should run away from foundations without affecting neighbours, driveways or sidewalks. It also warns against trip hazards and winter ice, and recommends an extension after barrel removal. These are useful risks to check, but Toronto's sewer-disconnection requirements are local rules, not a North American standard. City of Toronto drainage guidance
Do not assume an old underground pipe is the right winter destination. Ask your municipality or a qualified drainage professional if the lawful route is unclear. A fixed distance found online cannot establish whether your own ground slopes back towards the house or sends water onto someone else's property.
Before calling the job finished, walk the proposed flow path. Does it cross an entrance? Can you still open the gate? Where would water go after leaving the extension? If there is no workable route, get advice before connecting it.
Finish with the barrel, then check the next rainfall
Rutgers recommends draining before the first hard freeze, disconnecting the barrel and leaving its faucet open. It prefers indoor storage where possible; a barrel left outdoors needs to be kept from refilling and secured against wind. Follow any additional instructions for your barrel and fittings. Barrel storage guidance
Once fitted, check the route during the next rainfall from a safe position. Look for leaking joints, a blocked outlet or water returning towards the building. This is a practical follow-up check, not proof that the arrangement can handle every storm. Keep the removed summer parts together so the spring changeover does not begin with a missing connector.